Getting Started with KNX IoT Virtual
Introduction
This guide will walk you through how to get the source code for a KNX IoT Virtual device, and how to build it. No special hardware is required to run KNX IoT Virtual devices.
What is KNX IoT Virtual
KNX IoT Virtual is a GUI-enabled simulation of a KNX device. This consists of two sample applications with GUI, which can be configured as a small installation:
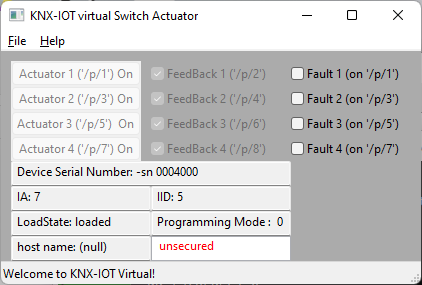
- LSAB: a simulated switch actuator (light)
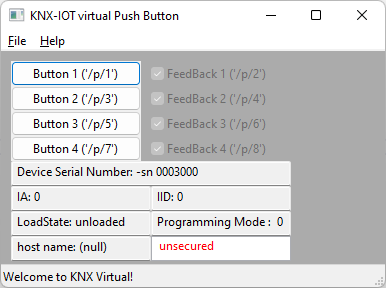
- LSSB: a simulated push button (light toggle)
Each device has 4 channels. The Push Button application has 4 push buttons and 4 feedback widgets. Note: In the context of KNX the word “channel” is synonymous with functional block instance. More about functional blocks here.
The Switch Actuator application has read-only buttons which indicate if the light is turned on or off, and a mechanism to introduce a fault.
More info on the applications can be found in the KNX IoT Virtual repository.
Requirements for KNX IoT Virtual
Windows PC: see information about building on Windows.
Steps
-
git clone https://github.com/KNX-IOT/KNX-IOT-Virtual.git cd KNX-IOT-Virtual -
Build on Windows
mkdir build cd build cmake .. -
Open Visual Studio with the created
knx-virtual.slnlocated in the build directory. -
Build the solution
When everything is built, the executables will be available in the folder:
build\Debug.Note that the folder might be different due to the Visual Studio configuration.
-
Go to the folder where the executables were built in the previous step. Start an executable (files with extension .exe) by double clicking it. A Popup might appear to grant the device network access.
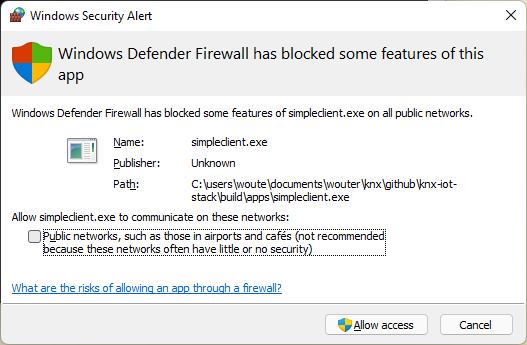 Accept the network work access.
The KNX device is now running.
More info
For more information about KNX IoT Virtual, see the main README file of the KNX IoT Virtual repository.